process

Event Horizon. by Mark Leichliter

This project kind of came out of the blue, courtesy of the hard work of The National Sculptors’ Guild. The City of Paramount, California commissioned me to scale up this smaller, gallery-sized piece to add some pizzazz to their Progress Plaza at City Hall.

Below are some progress shots of the fabrication process.

Local Color. by Mark Leichliter

Delivered my latest public art piece to the City of Little Rock, Arkansas. I won a national competition to design a sculpture, with the criteria being wide open; they wanted the artists submitting to have free reign to create whatever they could dream up. I’m honored and humbled to have once again worked with the fine folks out there to build something cool to enhance the community.

"Local Color" came about after my discovery of the State Butterfly of Arkansas, the Diana Fritillary. I was intrigued by the startling contrast between the male and female of the species, and the complimentary hues of each. The Diana displays marked Sexual Dimorphism, wherein the sexes have dramatically different size or coloration. The sculpture consists of both forms of the Diana, realized in multiple metals with differing finishes, on opposite sides of a low relief–like a coin with heads and tails. The striking differences give the sculpture a built-in Eureka moment, as well providing a platform for discovering the beauty of Arkansas' natural world.

Below are some shots of the design and proposal for the project.

…and a bunch of photos from the actual fabrication:


Local Color finished - male side

Local Color finished - the female side

Fire Tools. by Mark Leichliter

Once I decided the CinderCone required an ash door to clean out the fire basin, it was pretty self-evident that some tools to facilitate the process were in order. That, and my own set of tools was pretty homely and long in the tooth. I elected to run with the hexagon motif and stick with solid stainless for the material.

The Poker/Hook. Went with hexagonal rod for the shaft to really drive home the idea that Hexes Are Awesome.

The Poker/Hook. Went with hexagonal rod for the shaft to really drive home the idea that Hexes Are Awesome.

Shovel. 11 gauge stainless steel scoop with tab and slot construction.

Shovel. 11 gauge stainless steel scoop with tab and slot construction.

And… the tongs. Challenging design, but worth it.

And… the tongs. Challenging design, but worth it.

With the tools designed, I realized they needed a place to live — one that complimented the CinderCone but was capable of standing on its own, too.

A “garage” to store the tools. The Hive!

A “garage” to store the tools. The Hive!

CinderCone: Making V2, Part 2. by Mark Leichliter

With the fire basin pretty much finished, time to tackle the upper section - the place where all the magic happens. These faces are where the cutouts reveal the fire through a pattern of flowing, distorted hexagons - giving CinderCone its unique look.

With the “belt line” brackets all welded together into a rigid ring, they can serve as a jig for aligning the patterned faces. I built a fancy fixture to hold adjacent faces while tacking their tops.

With the “belt line” brackets all welded together into a rigid ring, they can serve as a jig for aligning the patterned faces. I built a fancy fixture to hold adjacent faces while tacking their tops.

Bolting the bottoms and tacking the seams is a pretty quick, straightforward proposition.

Bolting the bottoms and tacking the seams is a pretty quick, straightforward proposition.

Stitch welding the seams - an inch of weld, skip 3 inches, then another inch of weld. Lowers the amount of heat applied while allowing a bit of flexible relief for the strain of the heating/cooling cycle.

Stitch welding the seams - an inch of weld, skip 3 inches, then another inch of weld. Lowers the amount of heat applied while allowing a bit of flexible relief for the strain of the heating/cooling cycle.

On to the hardest part fo the whole process: the “eyebrow” over the fire door. All the other parts are just welded together in their flat state; the is one needs to formed into a curve. Hydraulics to the rescue!

On to the hardest part fo the whole process: the “eyebrow” over the fire door. All the other parts are just welded together in their flat state; the is one needs to formed into a curve. Hydraulics to the rescue!

The Eyebrow. Attached.

The Eyebrow. Attached.

With that, the upper section is finished.

With that, the upper section is finished.

CinderCone: Making V2.0 by Mark Leichliter

Now that I’ve figured out how to correct the issues that presented themselves in V1, it’s time to implement the changes. That means generating new patterns for the laser and having the improved design cut. I also went with slightly thicker material — 11 gauge instead of 12 — to provide a touch more rigidity. Let the games begin!

The updated upper faces. Here you can see the threshold below the door, and the updated trio of fastener holes in the bottom of each face.

The updated upper faces. Here you can see the threshold below the door, and the updated trio of fastener holes in the bottom of each face.

Voila! The laser-cut metal in all its glory.

Voila! The laser-cut metal in all its glory.

The bottom plate and fire basin faces.

The bottom plate and fire basin faces.

The 3D model of the new & improved anchoring bracket…

The 3D model of the new & improved anchoring bracket…

… and its real-world counterpart.

… and its real-world counterpart.

To insure a proper fit, I bolt the brackets into the fire basin and tack them together while there. Here, you can see how the ring of brackets pins the grill in place.

To insure a proper fit, I bolt the brackets into the fire basin and tack them together while there. Here, you can see how the ring of brackets pins the grill in place.

Once tack welded, the brackets are removed, clamped securely flat, and the final welds added. Oh - about that work surface: I was massively frustrated with how my fixturing and clamping setup worked on the prototype, so I broke down and bought a fan…

Once tack welded, the brackets are removed, clamped securely flat, and the final welds added. Oh - about that work surface: I was massively frustrated with how my fixturing and clamping setup worked on the prototype, so I broke down and bought a fancy German fabrication table. I really only spend money on things that make making better.

That’s the first half of the assembly for version 2. I’m really pleased at how the design is working out, and the new welding table not only makes things easier, but insures that the quality of my parts is top notch.

CinderCone: Back to the Drawing Board. by Mark Leichliter

With lessons learned from the first burn trial-by-fire (literally), I went back into my model on the computer and started implementing improvements. Chief among these was a way to stabilize the grill and a better system for attaching the top section to the fire basin. I also wanted to add in an ash door and a way to stiffen up the feet (they had a bit of lateral deflection happening, albeit slight. Might as well fix it while I’m fixing, right?)

The biggest change was adding a “belt” that ran along the entire perimeter of the joint between top and bottom. This kills two birds: the belt pins the grill down to prevent warpage, and provides a super-beefy means of attaching top to bottom. You c…

The biggest change was adding a “belt” that ran along the entire perimeter of the joint between top and bottom. This kills two birds: the belt pins the grill down to prevent warpage, and provides a super-beefy means of attaching top to bottom. You can also see how I extended the bottom plate further out on the legs to stiffen them up.

Detail of one section of the “belt.” I used tab and slot construction to spare me the hassle of alignment, plus it adds strength. Note the hexagonal cutouts that receive the nuts. Magic.

Detail of one section of the “belt.” I used tab and slot construction to spare me the hassle of alignment, plus it adds strength. Note the hexagonal cutouts that receive the nuts. Magic.

The CinderCone’s “Belt.”

The CinderCone’s “Belt.”

The finished V2 design. I added a bit of a “threshold” under the door to allow for a full 360° of attachment, top to bottom.

The finished V2 design. I added a bit of a “threshold” under the door to allow for a full 360° of attachment, top to bottom.

CinderCone: First Burn. by Mark Leichliter

With the welding and sanding and bolting all finished up, it’s time to test this thing out. My dear friends Bruce and Cyndi volunteered their beautiful property on the lake for a test site, and, once a day with cooperative weather materialized, it was time.

What an amazing evening! Couldn’t have been happier with how the CinderCone performed — and the visual effect of the cut-out pattern when combined with the dancing flames was nothing short of spectacular. We stoked the flames MUCH more than required to have a nice fire in order to stress-test the design. Glad we did, as it revealed some structural shortcomings that would need to be addressed before offering these up for sale.


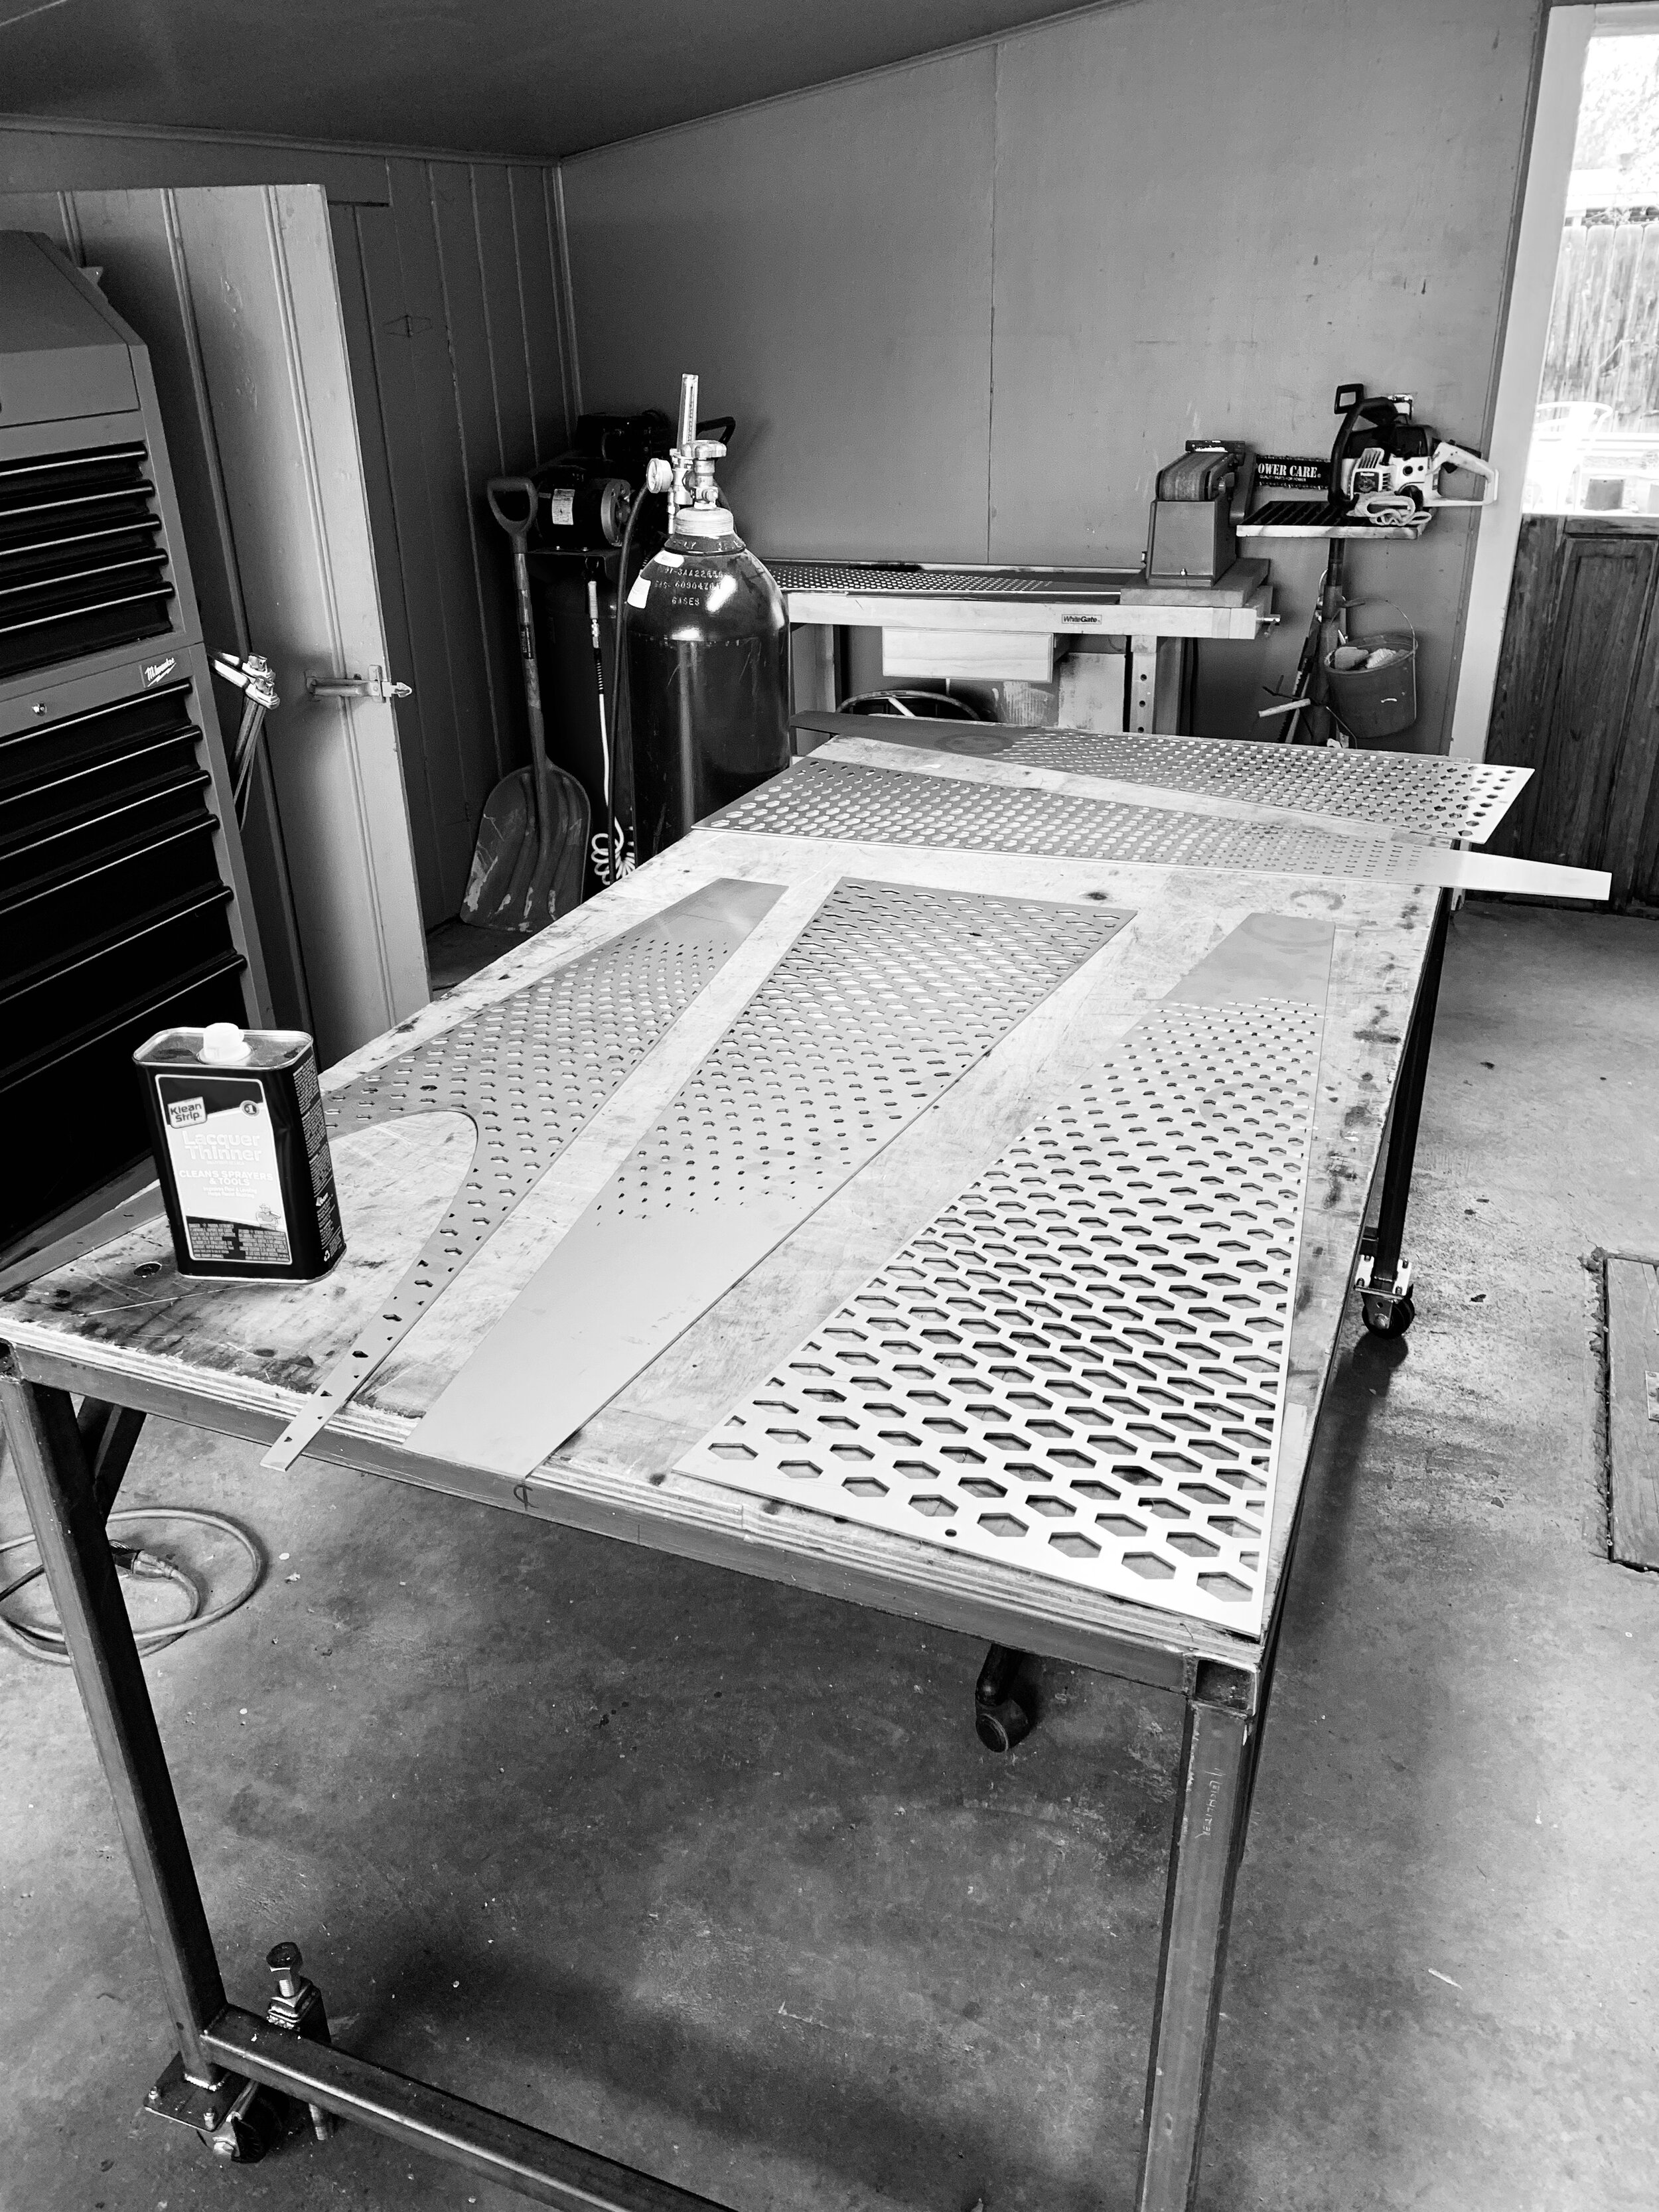
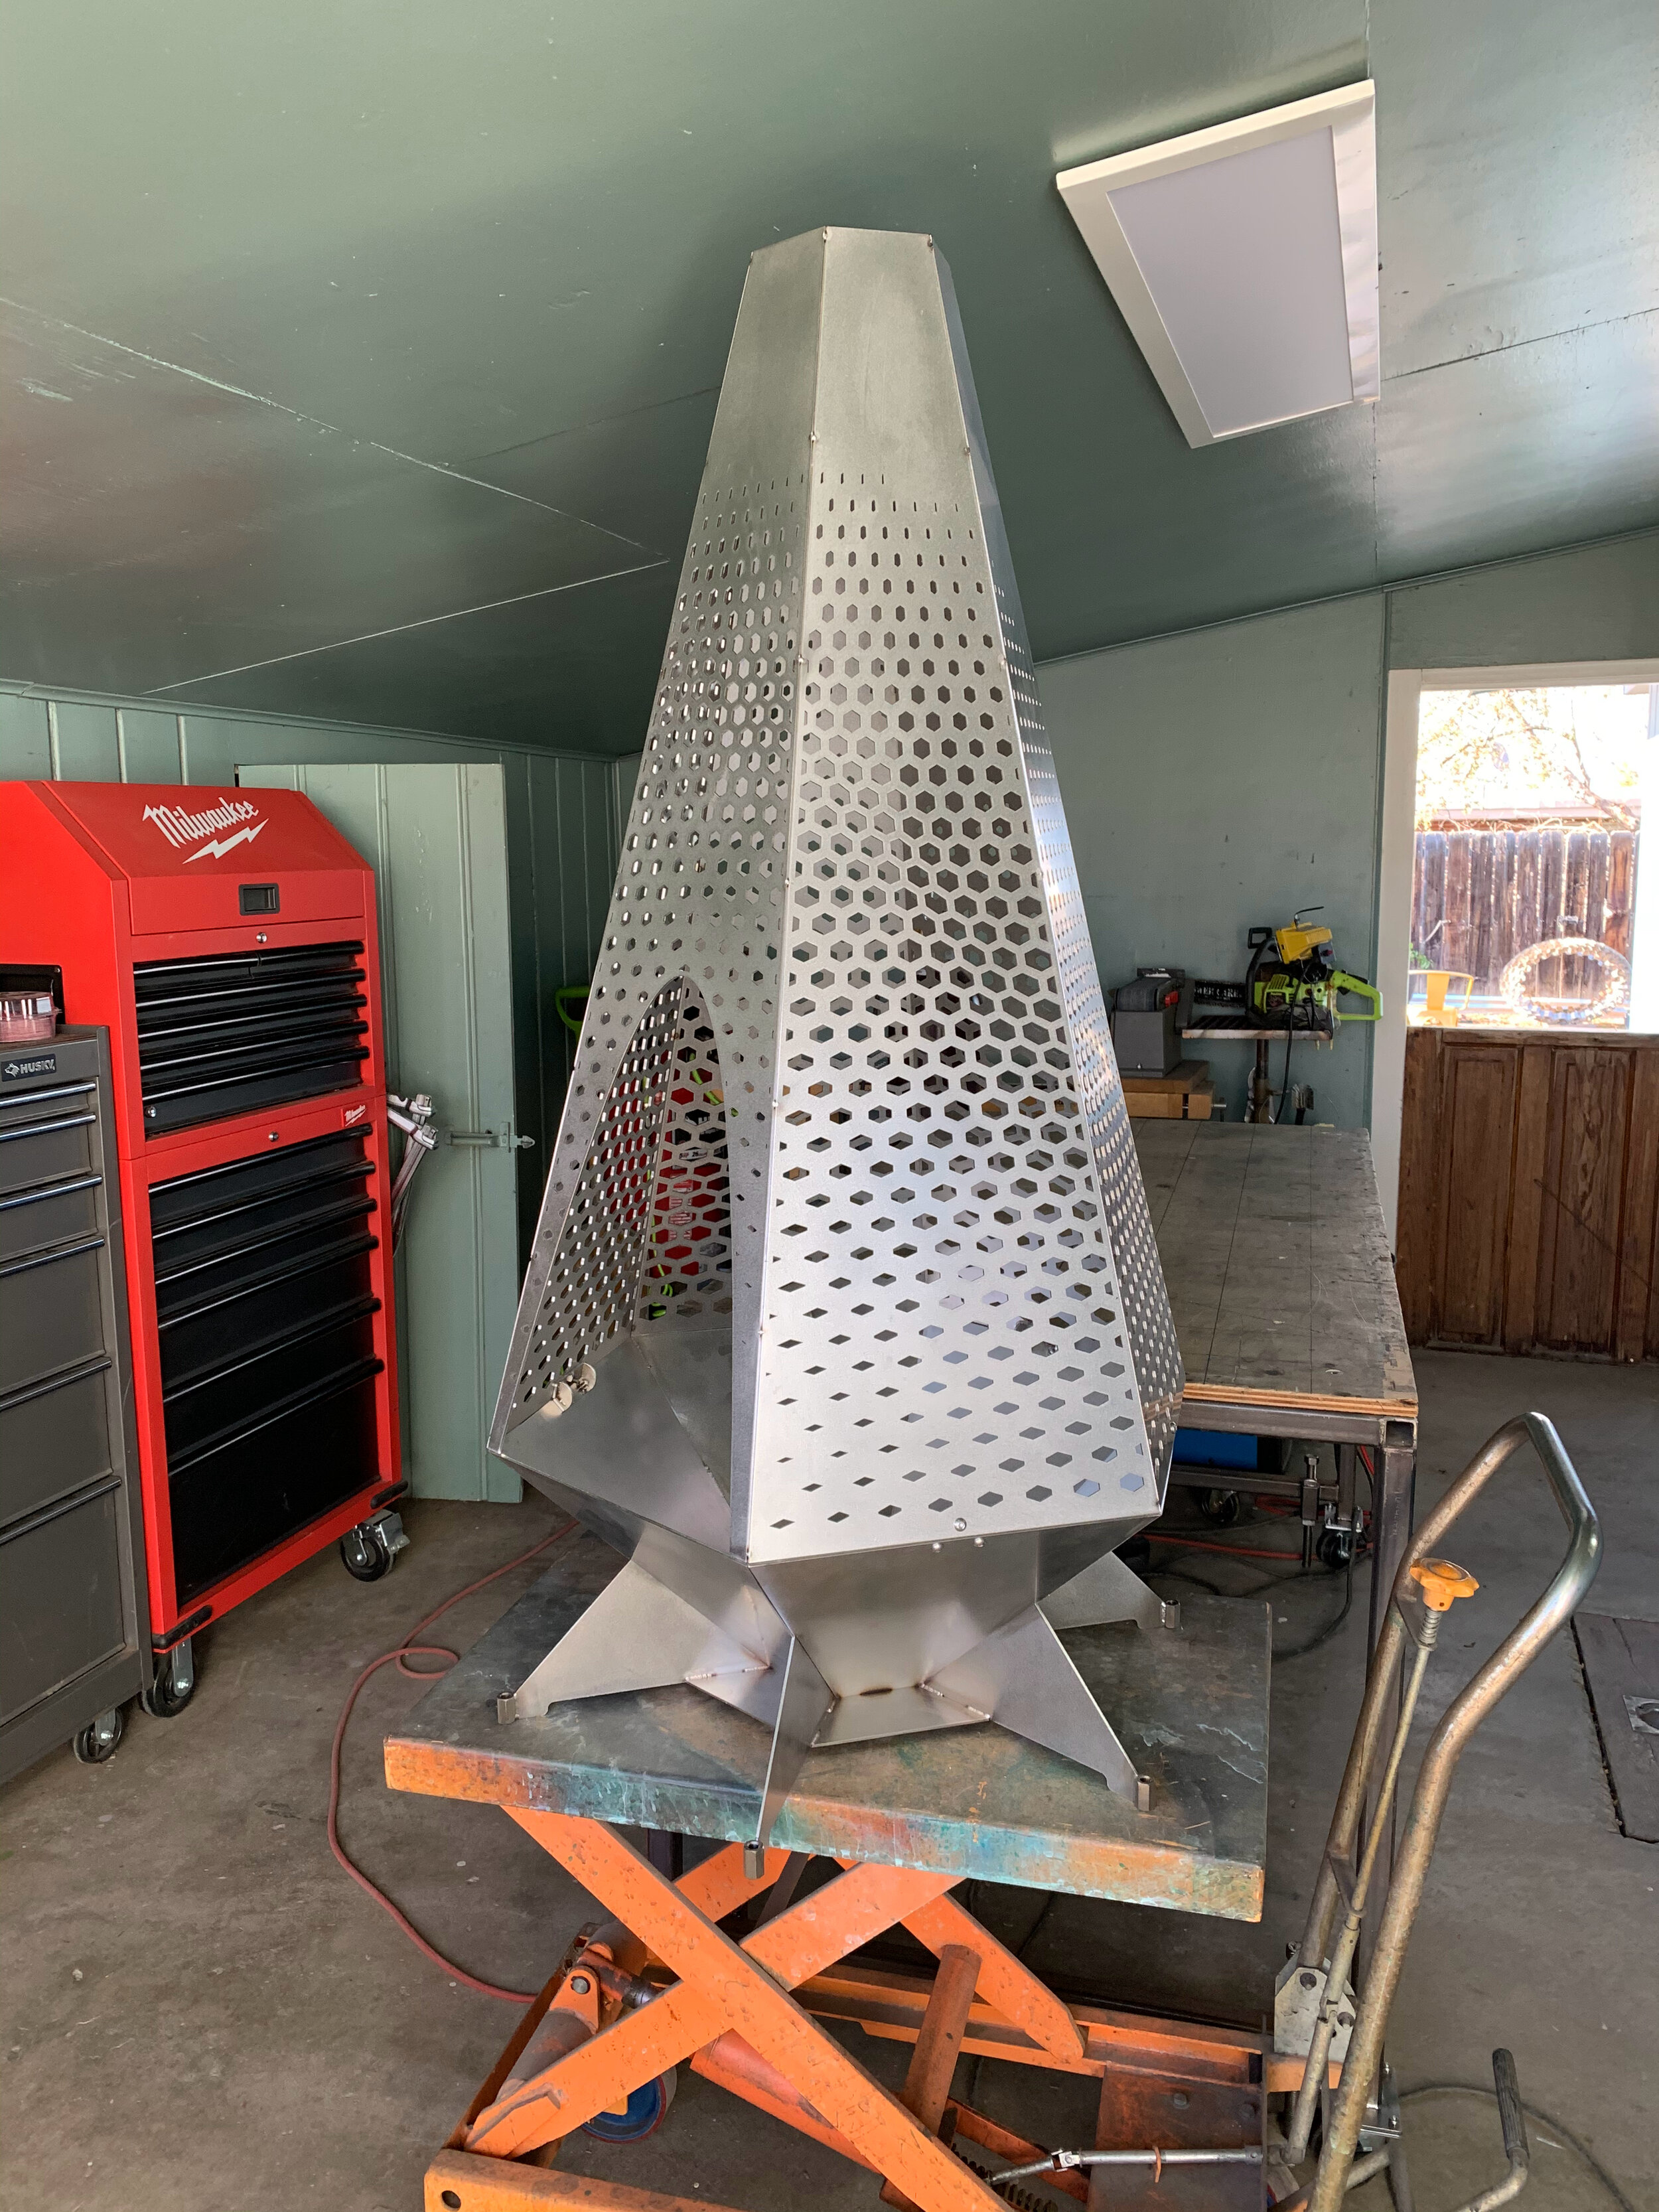
Metal may seem like a solid, stable material — one that you can rely on to hold its shape and remain true to itself under stress. In reality, it is subject to all kinds of movement when subjected to heat. These thermal stresses need to be countered to maintain the integrity of the object.

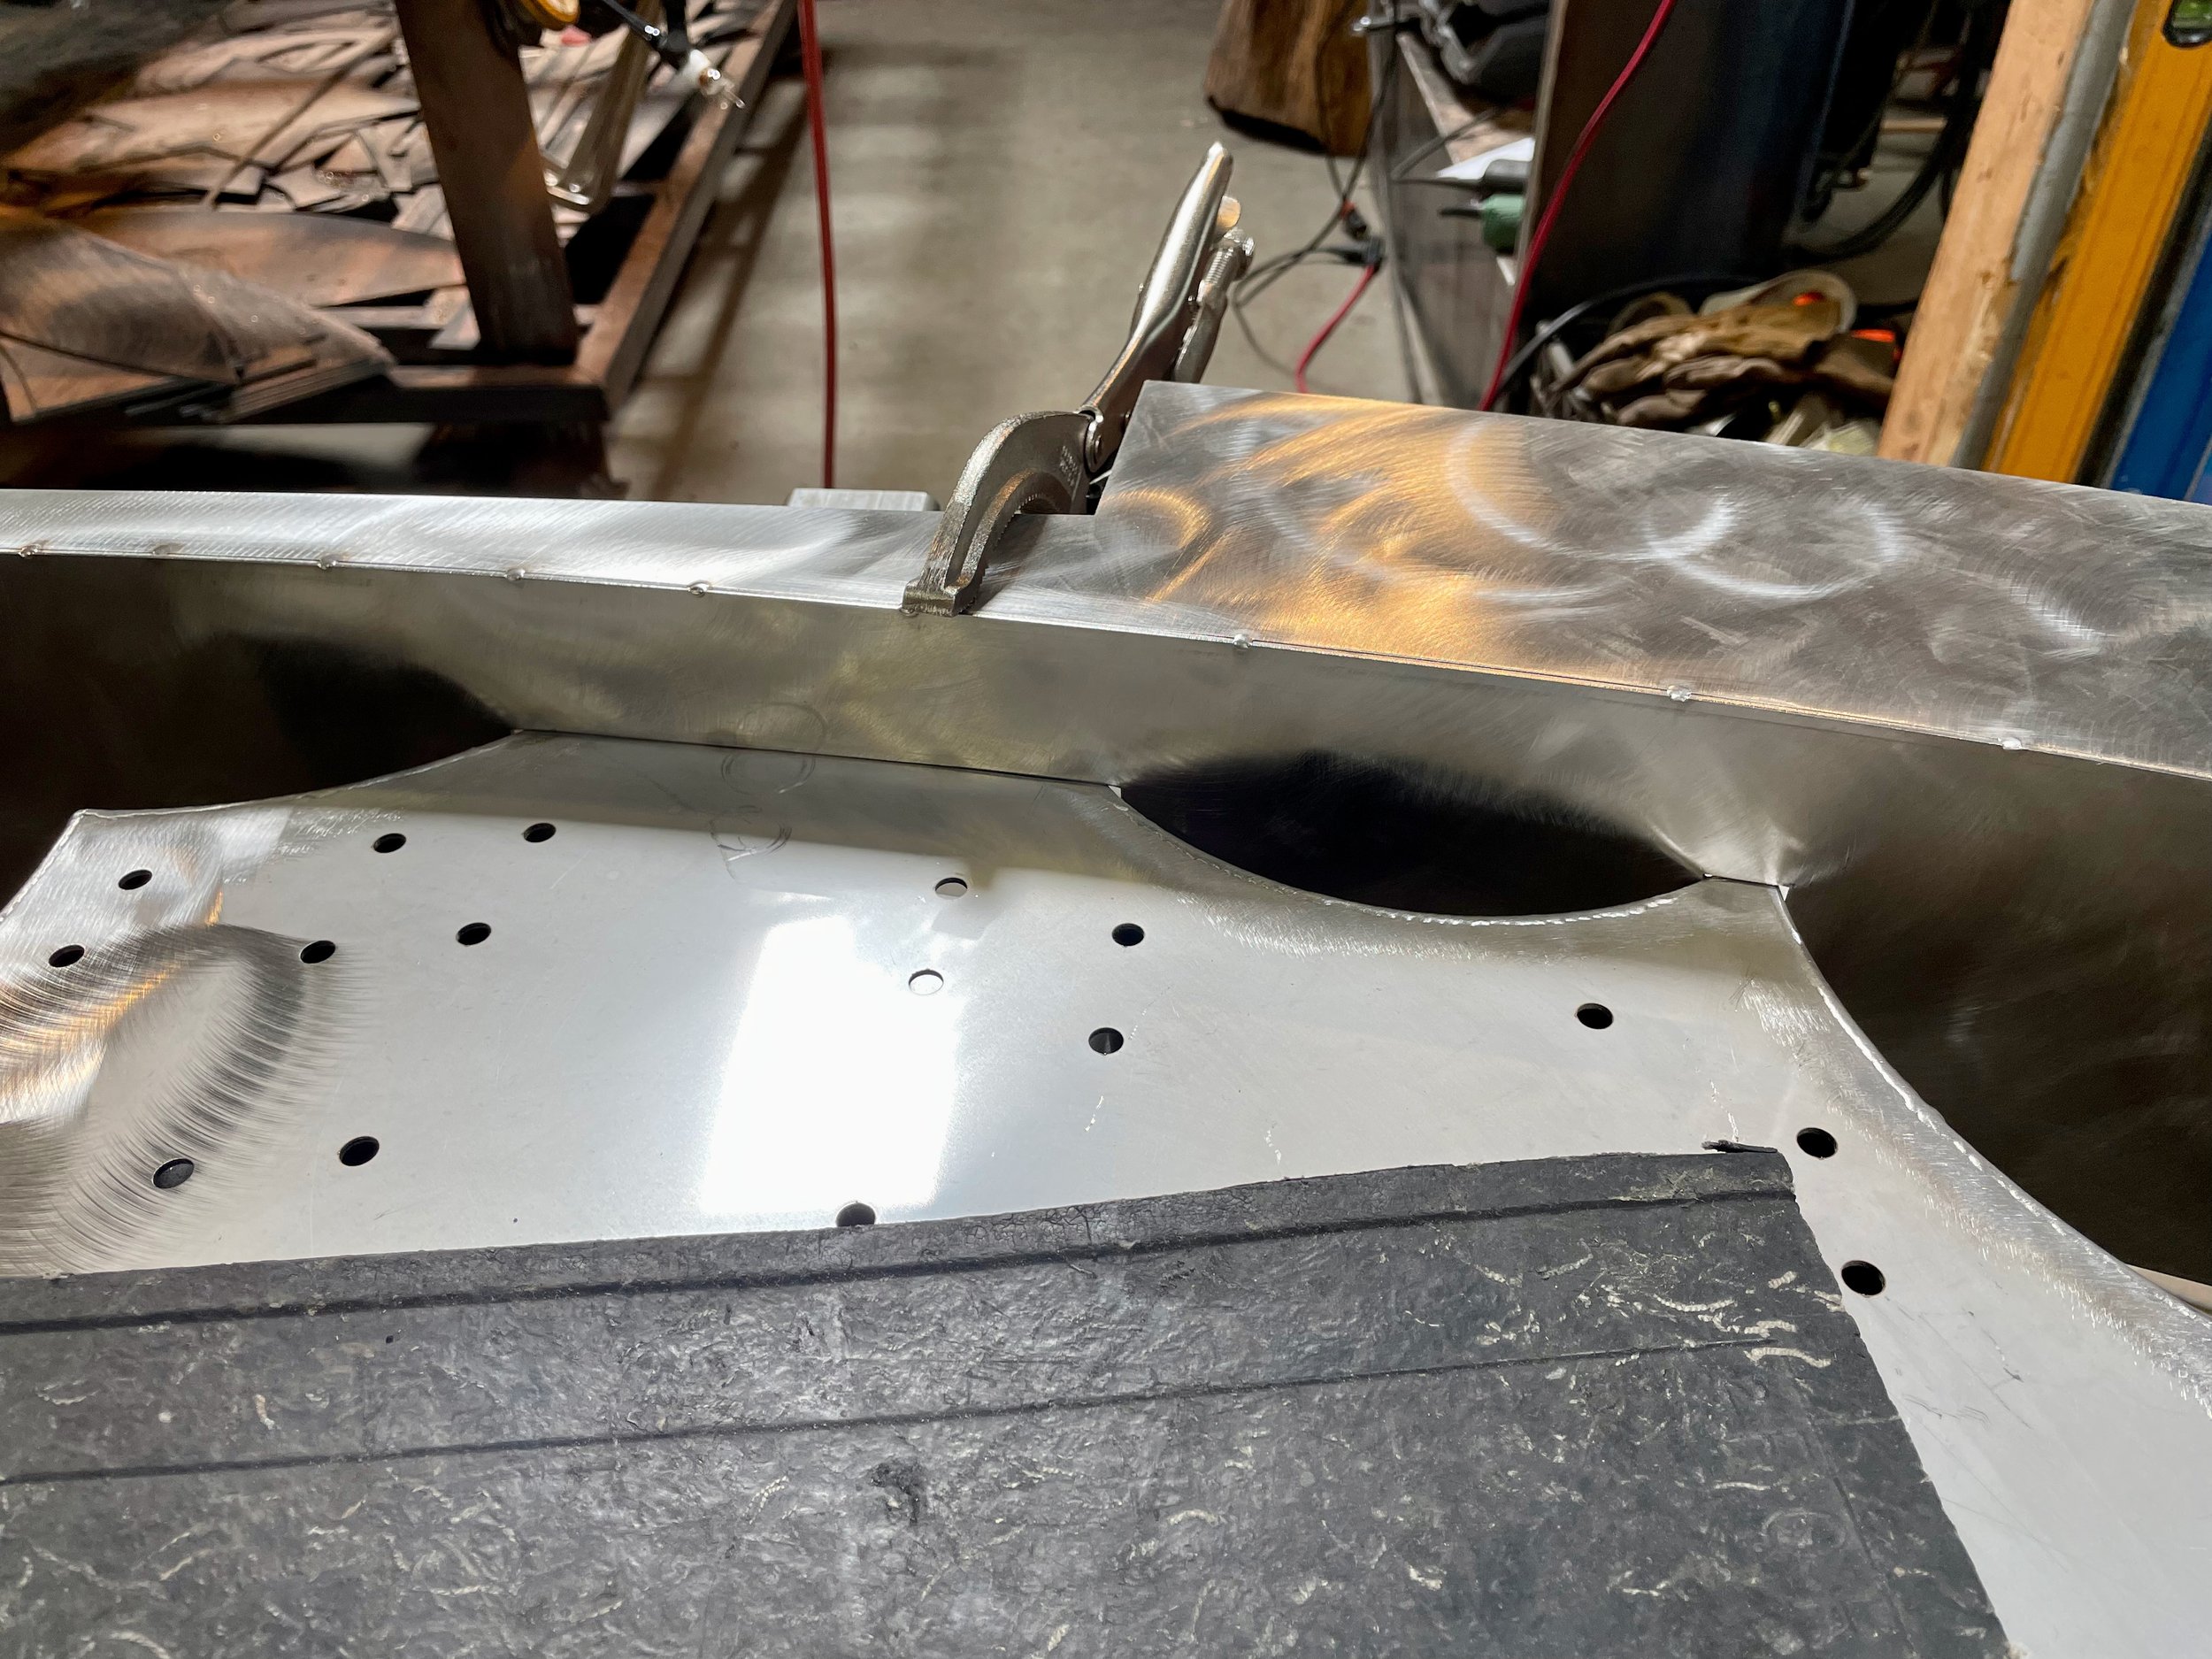
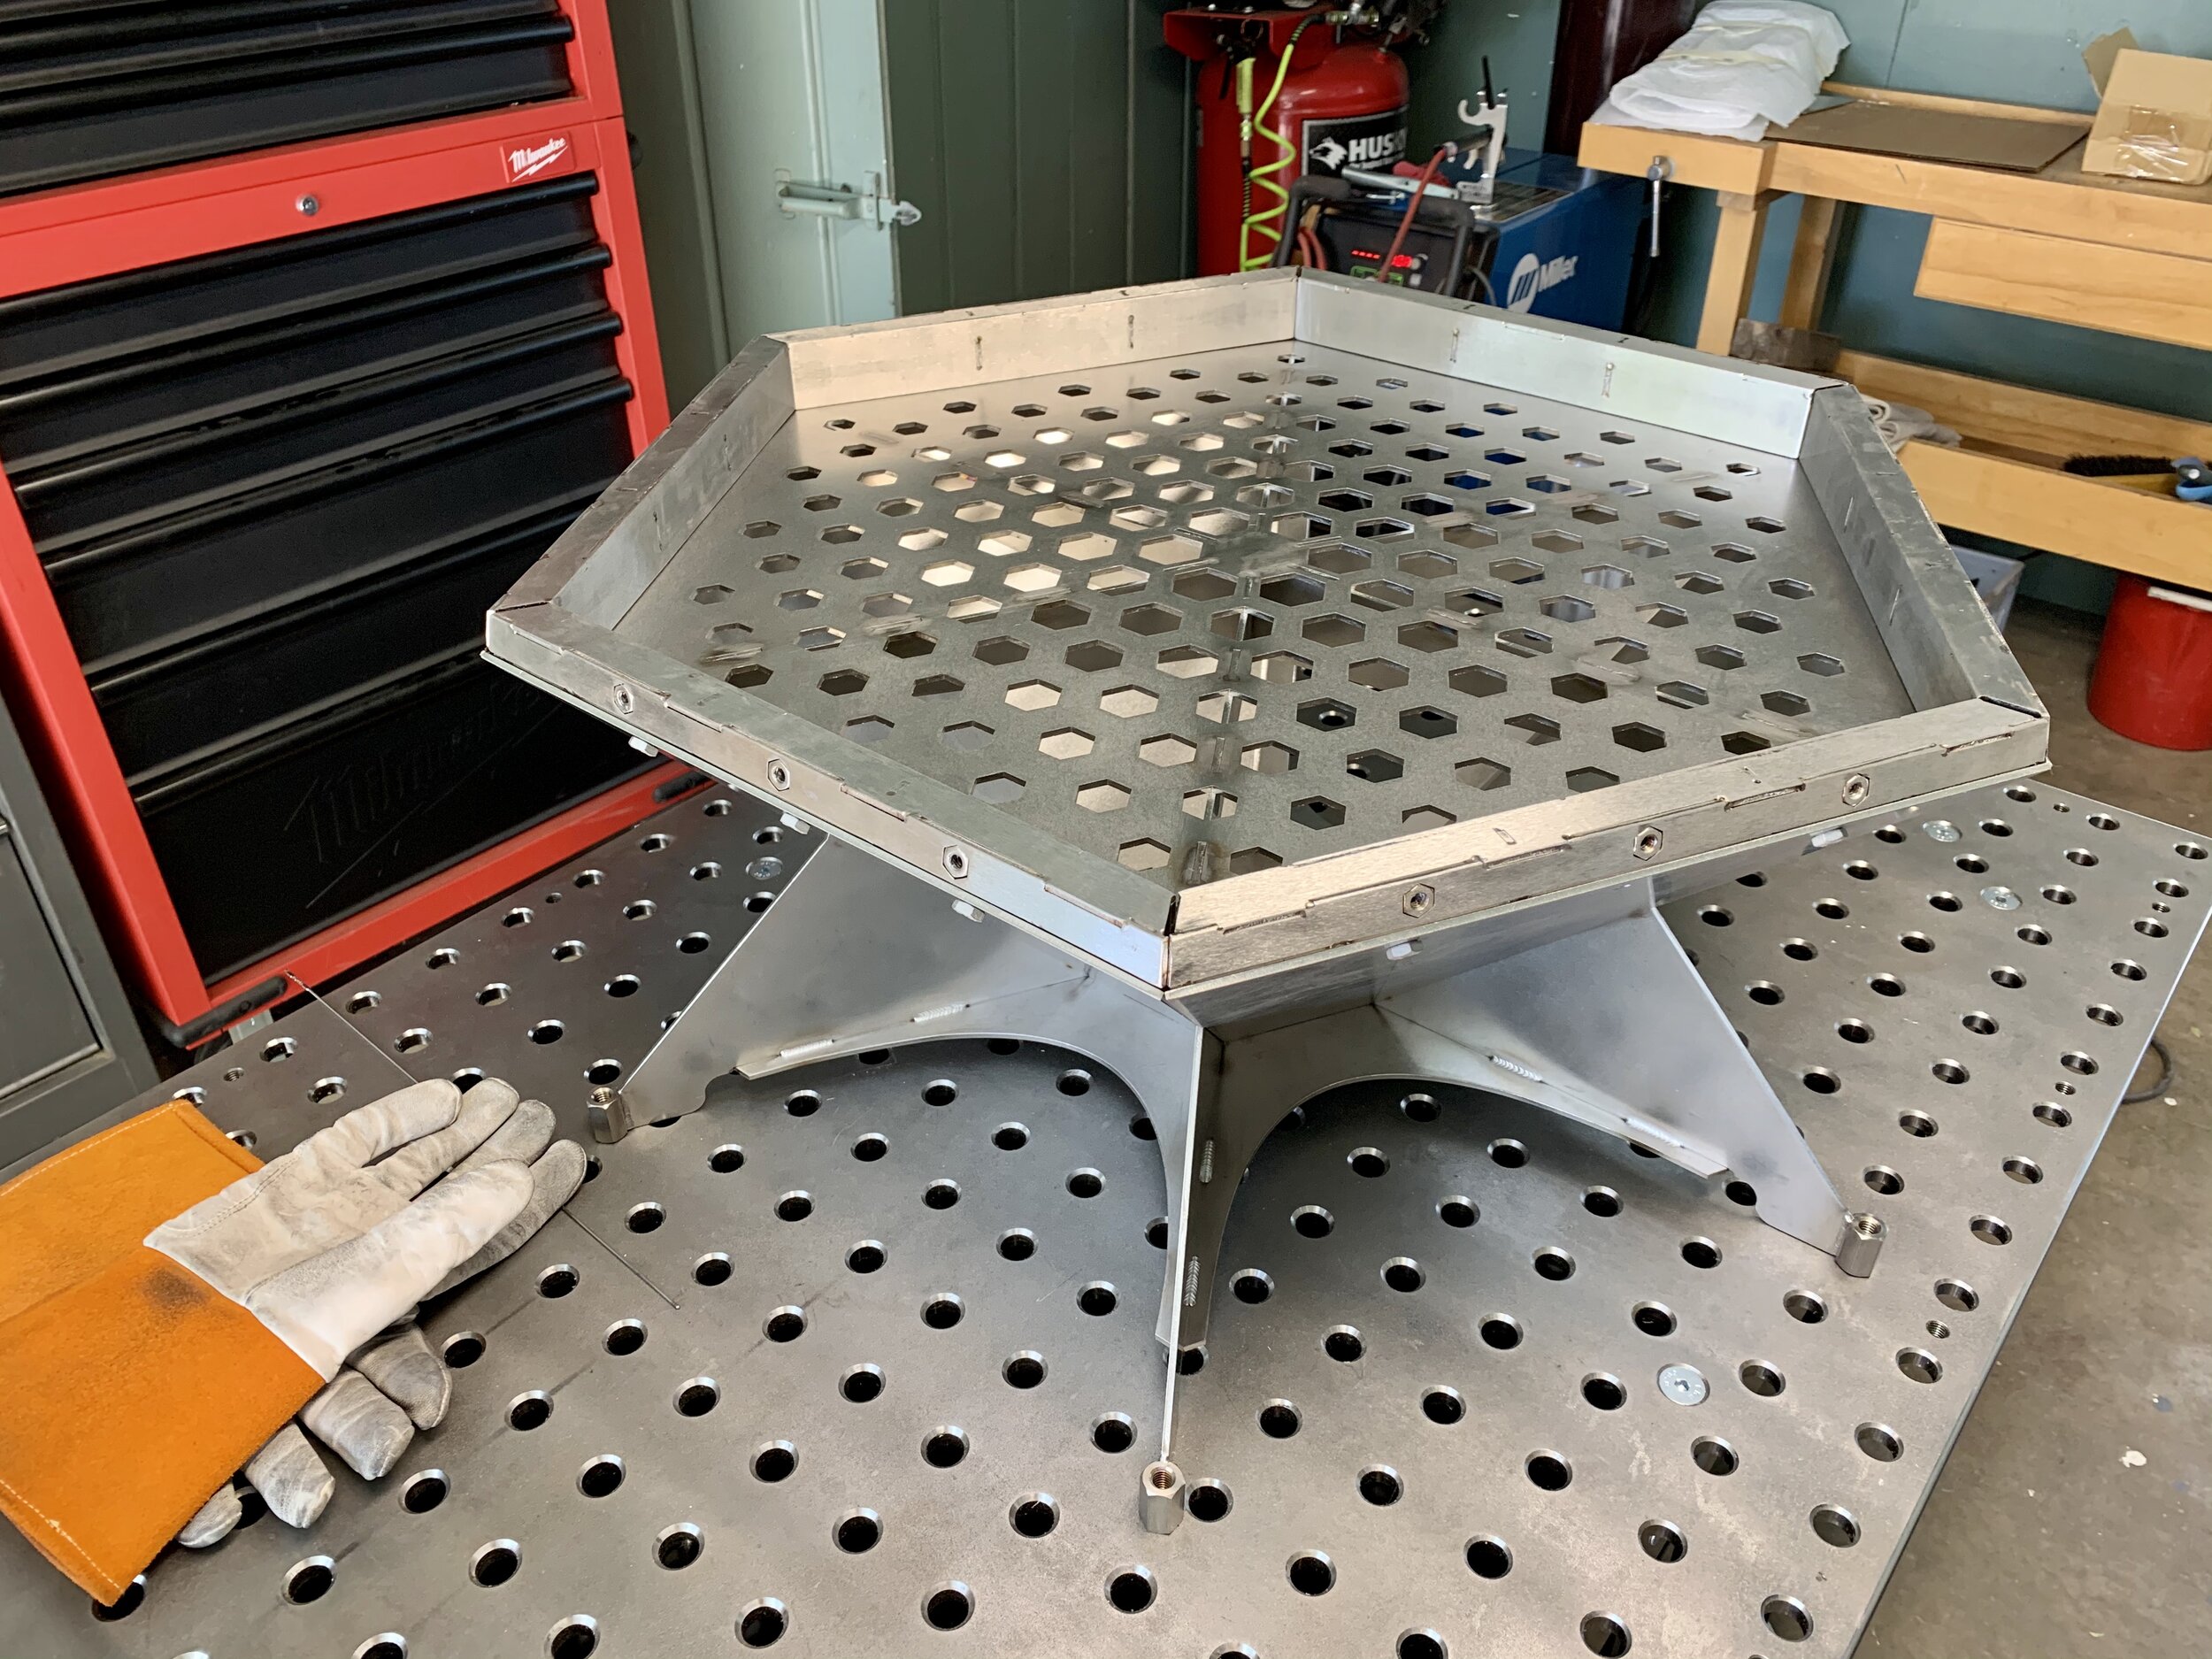
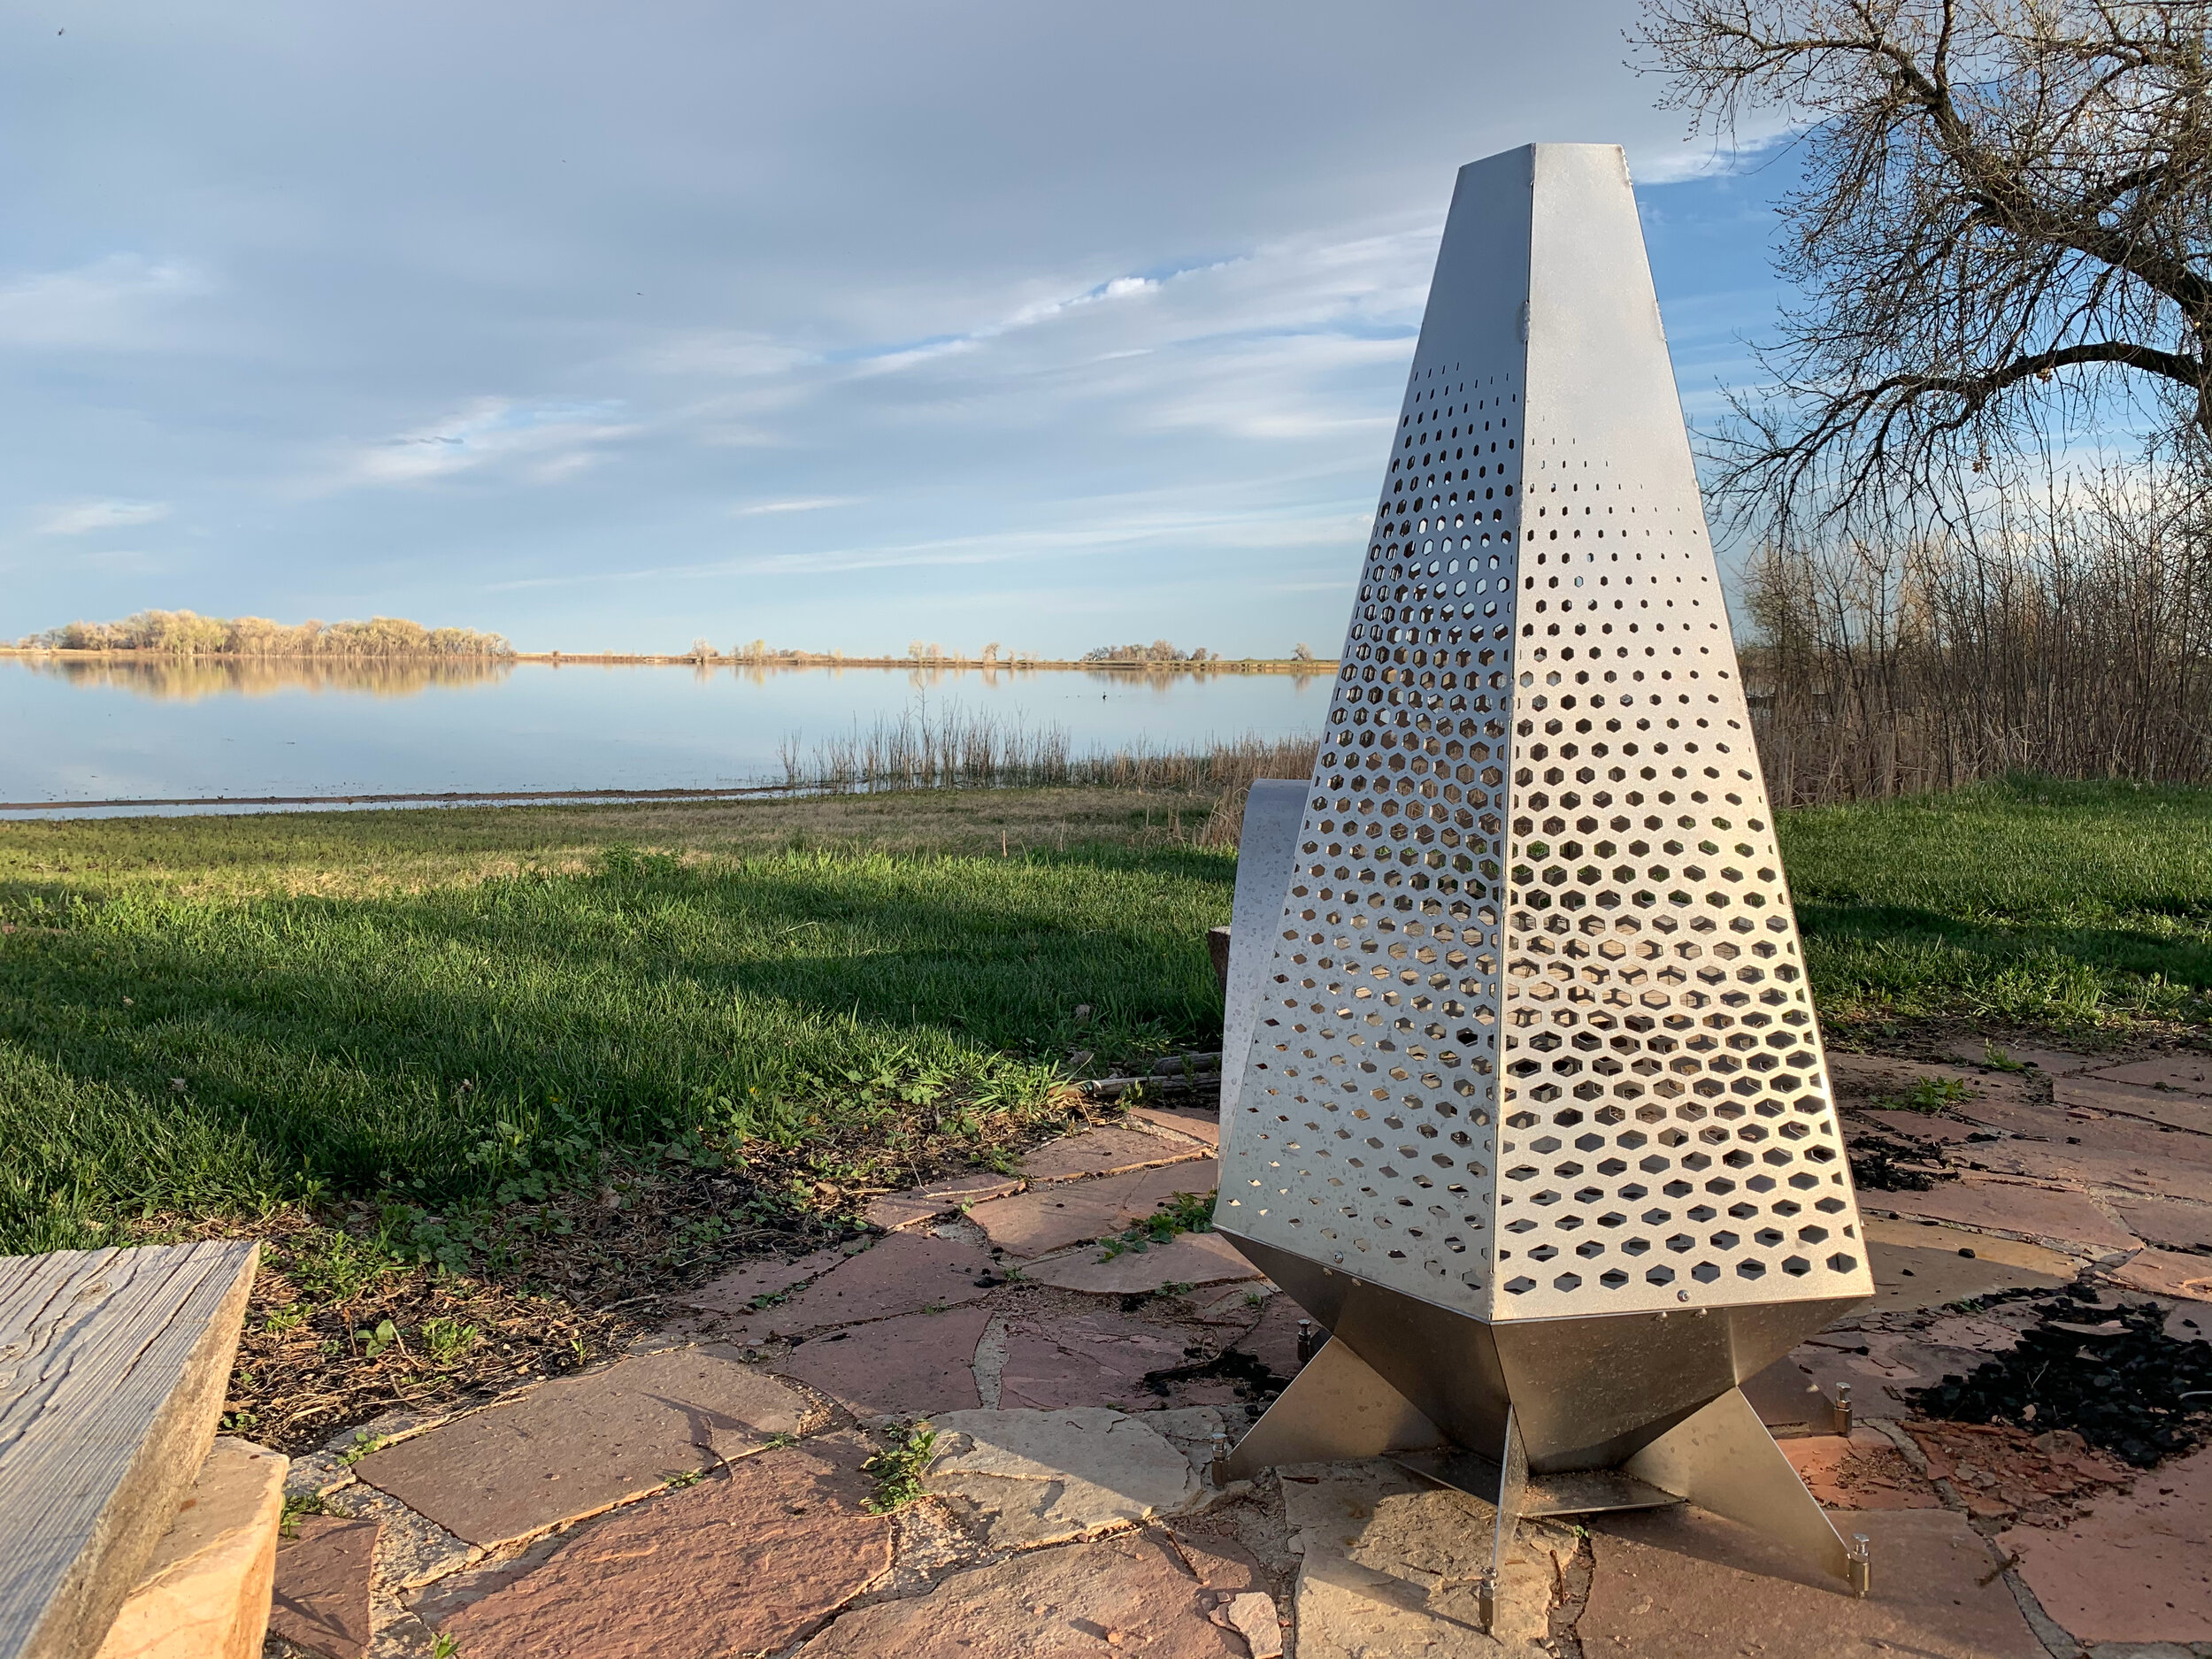
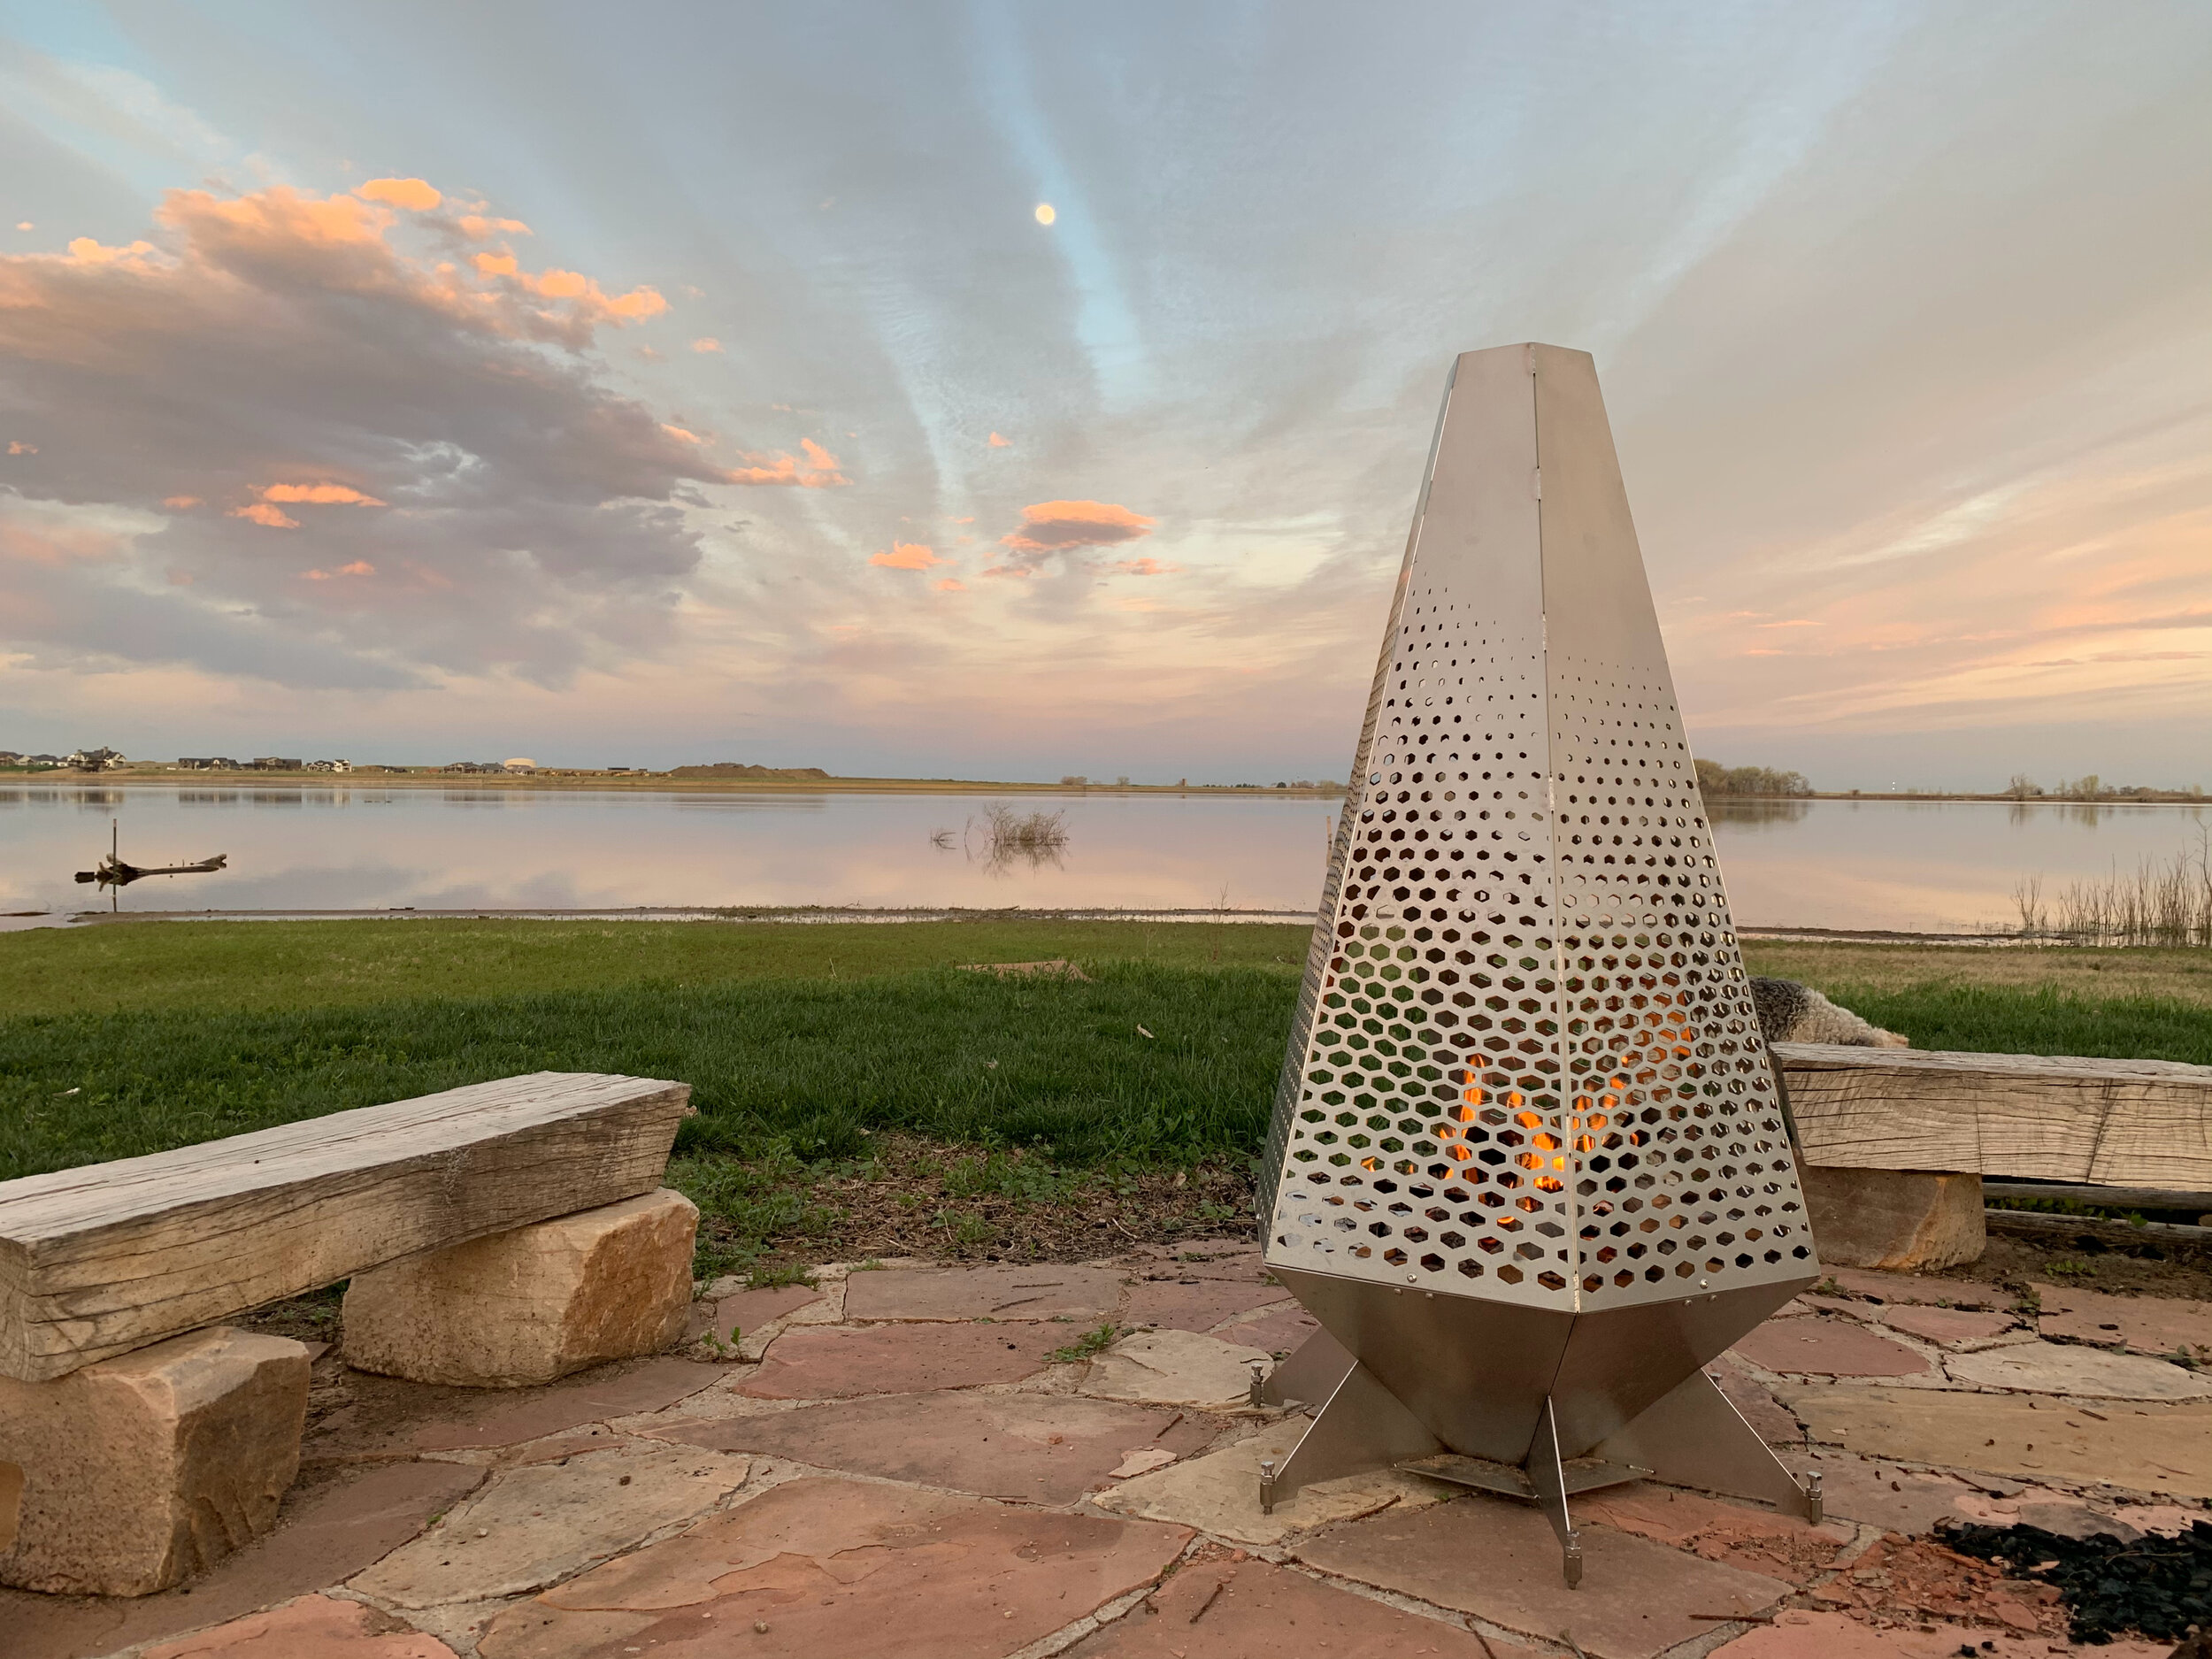
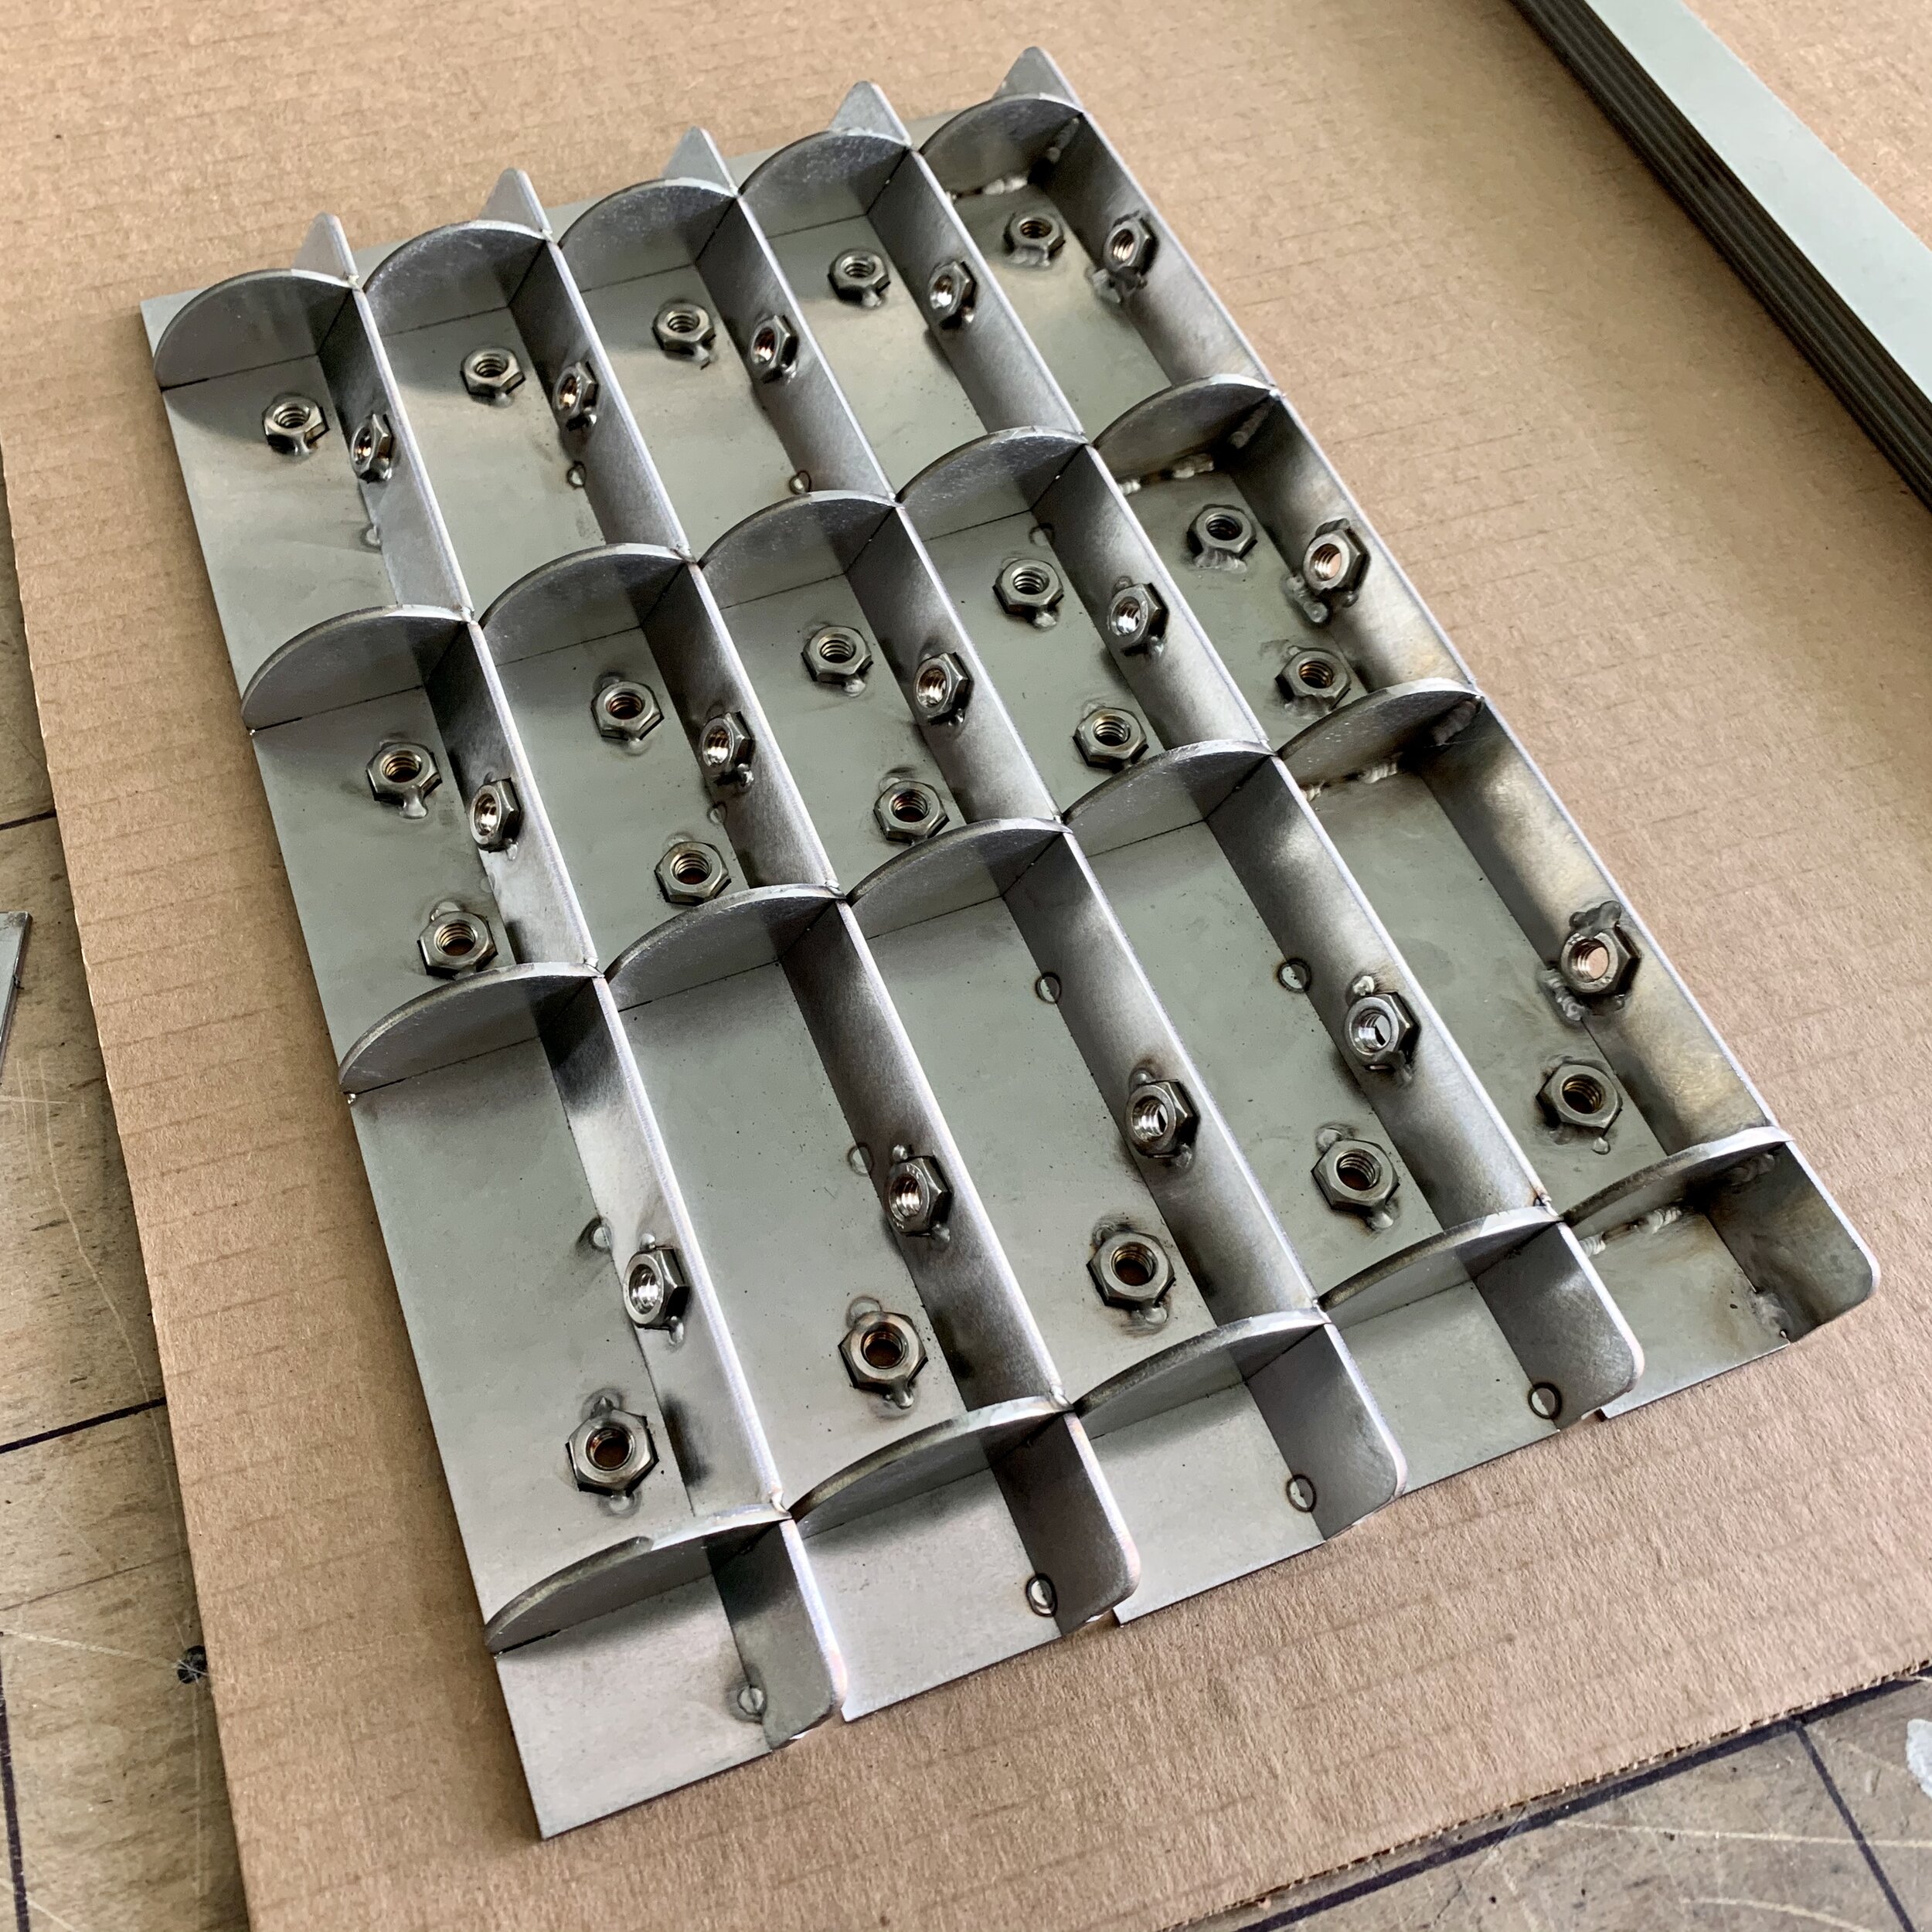
The aftermath of our stress test showed that the outer “shell” of the design handled these forces well — but the grill itself, directly in contact with the source of heat, needed some shoring up. Any welder can tell you that one only need curtail expansion and contraction throughout the heating cycle to minimize warping. The grill was allowed too much freedom in this design, and the forces went to work on it. I needed to do some redesigning, but thought I’d try to retrofit the V1.0 CinderCone before tackling V2.0.

Adding ribs that radiate outward from the center of the grill to add stiffness. Notice the bonus colors provided by the fire!

Adding ribs that radiate outward from the center of the grill to add stiffness. Notice the bonus colors provided by the fire!

The brackets not only attach the upper section to the fire basin, but they also serve to pin the edges of the grill in place. I fabricated longer brackets to spread this pinning action along the entire edge.

The brackets not only attach the upper section to the fire basin, but they also serve to pin the edges of the grill in place. I fabricated longer brackets to spread this pinning action along the entire edge.

A phalanx of new brackets ready to be installed. You’ll notice that there are only five; the side with the door doesn’t get one, and that proves to be problematic.

A phalanx of new brackets ready to be installed. You’ll notice that there are only five; the side with the door doesn’t get one, and that proves to be problematic.

After a second test fire, you can see just how much force gets applied to the grill, and why the design for the opening is not going to work.

After a second test fire, you can see just how much force gets applied to the grill, and why the design for the opening is not going to work.

So, although the overall design was a success, there are some structural details that need improving. Another sticking point was removal of the ash that accumulates beneath the grill. I’d thought that removing the top section and grill would be easy enough to access this area, but adding the longer brackets and their additional fasteners made that too big a hassle. This thing needs an ash clean-out door.

On to CinderCone Version 2!

CinderCone: How, Part 2. by Mark Leichliter

Now that the design and layout work is complete, and the laser has done its thing, the real work begins. Or the FUN, depending on your feelings about welding and sanding metal. The interesting thing about my process is just how much of the fit-up and fixturing is simplified by the earlier CAD work — there’s very little guesswork or problem solving left at this point. Photos below tells the story of assembling the first CinderCone prototype.

Ch-ch-changes. by markleichliter

A couple pieces of news.

First, after 25 years together, I am no longer represented by the National Sculptors' Guild and Columbine Gallery.

Second, new developers have bought the building my shop was in. So, almost 4 years to the day since I moved in, (much like Elvis) I've exited the building.

Here it was in 2014, ready to get to work:

Hello Shop

Hello Shop

Goodbye Shop

Goodbye Shop